Important note
Sitecore docker repository is a live repository it means that EVEN Tomorrow SCRIPTS can work different then described in my POST.
In this article, you will learn:
- how much disk space do you need to create images for Sitecore Docker
- why sometimes you fail to build Docker images
- how to make precisely the Docker images as you like
Cleanup your disk – before you start
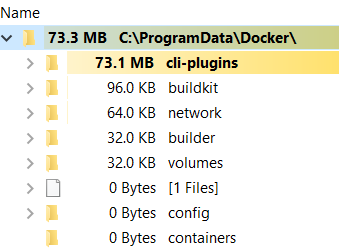
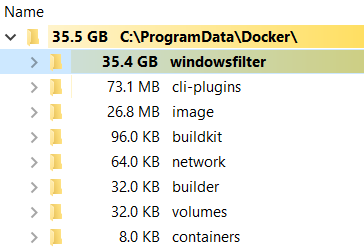
Keep in mind that a play with Sitecore Docker images can be a disk space consuming. Mostly Docker data resides in C:\ProgramData\Docker. On the pictures below, you can see a disk space consumption after building a Sitecore 9.3 XM architecture.
Here is a detailed list of what was precisely build. To display Sitecore images, you can use the command:
docker images sitecore*
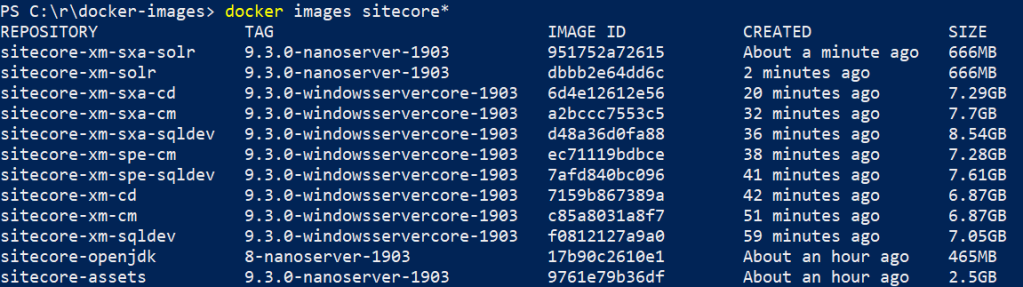
As you can see in the picture above, a lot of variants were built. Later in this article, I will explain to you how to reduce the number of images.
Understand the content of repository
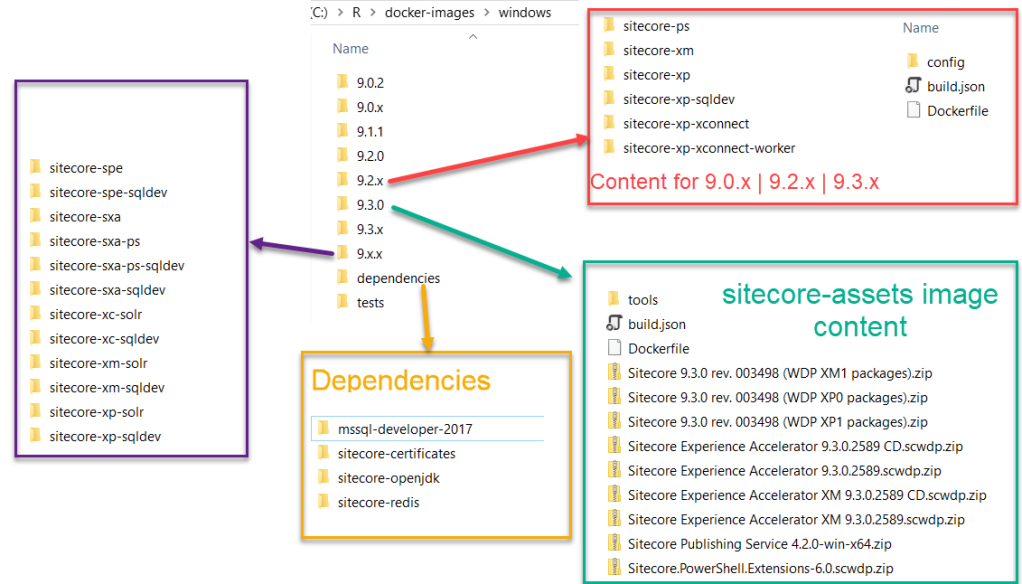
Please clone a Sitecore Docker repository using your favorite tool. For your convenience, I did a screenshot just after clone. We can use this as a reference to understand what is where. I removed files and folders not crucial at this moment.
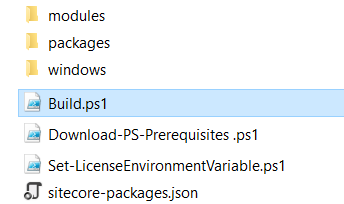
Modules folder – In the modules folder you can find a source code for a Sitecore Image Builder module responsible for building Docker images with Sitecore on board.
Build.ps1 – Sitecore Image Builder module is executed by the script build.ps1, in this script you will do all modifications to get a result that you need.
Download-PS-Prerequisites.ps1 – If you want to build images that uses the newest Publishing Service then you have to use a script Download-PS-Prerequisites.ps1 to build a publishing service web deploy package.
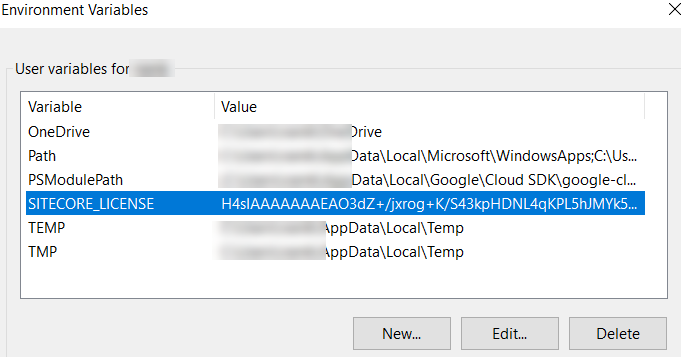
Set-LicenseEnvironmentVariable.ps1 – Of course Sitecore cannot works without a valid license.xml file. To make a license.xml visible for all images with Sitecore 9.3 you should use script Set-LicenseEnvironmentVariable.ps1. This script will add license file to a environment variable.
sitecore-packages.json – is a file with links to Sitecore packages.
Windows folder – this is the heart of Docker. In the Windows folder, you can found all configuration files required to build images. In the picture below, you can see a typical structure.
Understand what to build.
As you know, each Docker container can run one service or exe file. It means that, if you want to run Sitecore XM architecture on Docker, you have to build the following images:
- sitecore-xm-sqldev – for MSSQL server
- sitecore-xm-solr – for Solr ( Solr image depends on sitecore-openjdk image)
- sitecore-xm-cm – for CM role
- sitecore-xm-cd – for CD role
- sitecore-assets – asset is an image with all Sitecore packages per Sitecore version (see picture above). Assets image is used to build other images as a source of packages and other files required during the build process.
The most important for beginning is PowerShell script – build.ps1. This script performs two operations:
- Download required resources from Sitecore Download
- Download and build images required to up and running Sitecore on Docker
My first suggestion is to modify build.ps1 script before first run and add the following lines:
# Do nothing, just let me know what you want to do.
$WhatIfPreference = $true
# Give me more details in case of troubles.
$global:VerbosePreference = "Continue"
- Whatif Preference – set it to true cause that you do not build any images but see what script wants to do.
- VerbosePreference cause that you will have more information in case of any troubles.
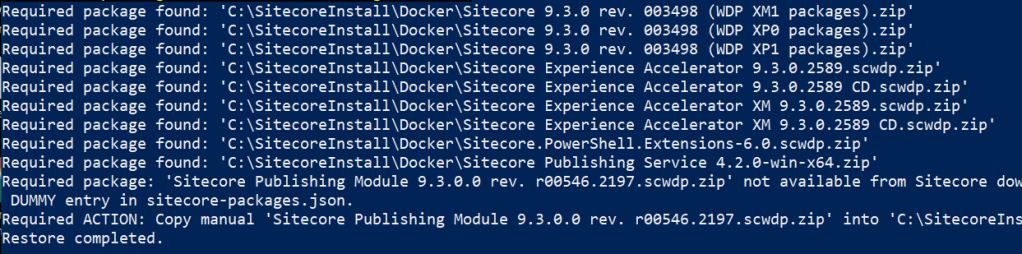
Save changes and run build.ps1 script in Powershell command line. As user and password pass any value, becasue you just execute a dry run and script will not download packages from Sitecore download site.
By default the latest Sitecore version images are build. You should see in console something similar to pictures below:
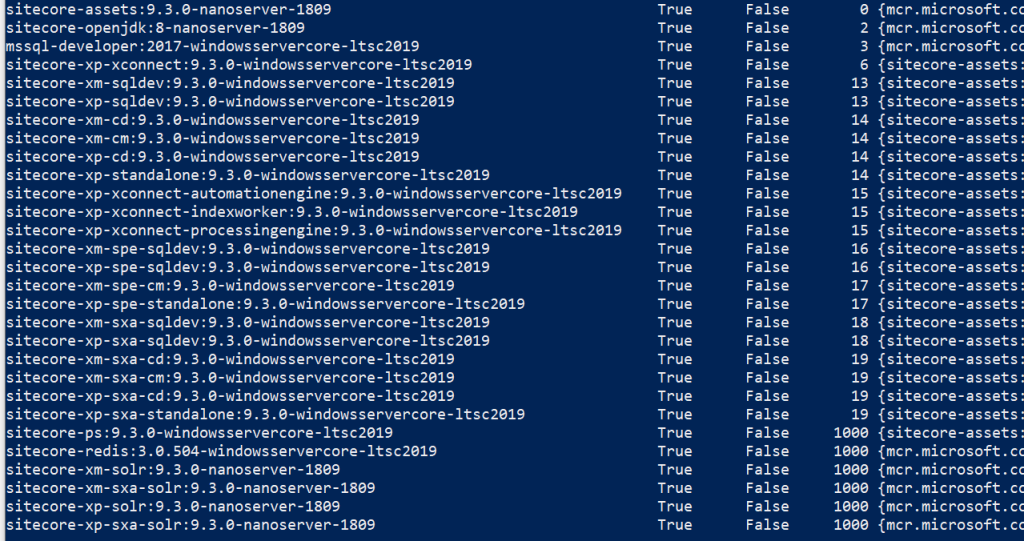
As you can see, by default a lot of different images are build. Let’s try to be more specific. As you can see each image tag is build in the following way:
sitecore-<TOPOLOGY>[-VARIANT]-<ROLE>:<SITECORE_VERSION>-<OS_VERSION>
I will do a little digression here about last element OS_VERSION. Sitecore windows containters depends on Windows Server Core and Nano Server images. Learn more about Windows Docker images.
I’m trying to say here that sometimes different versions of the image may not work . In that case try to use build images with different image version.

Let’s back to the main point and specify what you want to build. In my case I want to build just simple XM architecture with SPE and SXA modules. To specify what you want to build you have to introduce a tags variable and use this in your script:
$Tags = "sitecore-xm-*:9.3.0*1903"

SitecoreImageBuilder\Invoke-Build `
    -Path (Join-Path $PSScriptRoot "\windows") `
    -InstallSourcePath $InstallSourcePath `
    -Registry $Registry `
    -WhatIf:$WhatIfPreference `
    -Tags $Tags
You can ask, why you use 1903 at the end of script? This is not what I want.
By default script will build the same Sitecore images for each image version 1809,1903,1909 and ltsc2019.
Ok, why you don’t use the latest version ltsc2019. Becasue when I start my adventure it doesn’t work properly. Here is a list what script wants to build:

As you can see SOLR image is missing, it means if I even build all images I will not able to run a Sitecore becasue it depends on SOLR.
Why I not use 1909 ? Here is the answer:

Finally I use: $Tags = “sitecore-xm-*:9.3.0*1903” and after, after, after sometime all my images were ready to use.
Remember to change WhatIfPreference to false.
How to up Sitecore containers.
When you build all images, it’s time to run containers and enjoy Sitecore.
Now you can ask, how Docker knows all these dependencies?
For this, Docker uses docker-compose command. Compose is a tool for defining and running multi-container Docker applications. With Compose, you use a YAML file to configure your application’s services.
YAML files for compose Sitecore are located in the folder windows/tests/9.3.x. On picture below you can see content for version 9.3
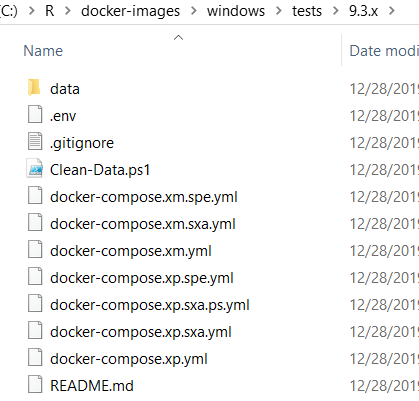
In the folder, you can see several configuration files to run different Sitecore architecture (XM & XP) with different modules (SPE & SXA).
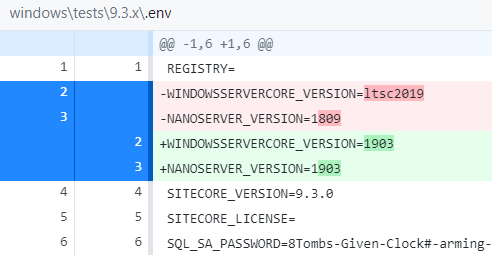
I changed a version of image from default one to 1903, it means that I have to change also configuration for compose command.
To change configuration please open .env file and update tags:
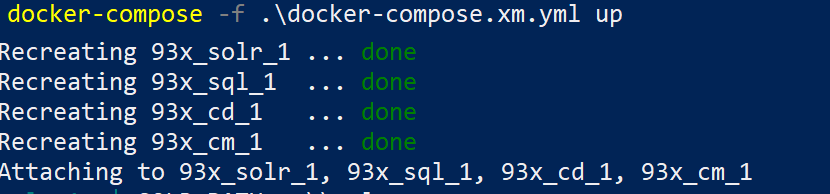
To make your environment up and running, you have to execute the following command:
How to get access to Sitecore and other services?
In each docker-compose.yml file, there is a port mapping where you can find the information how services are exposed to the external world. Please see the picture below:
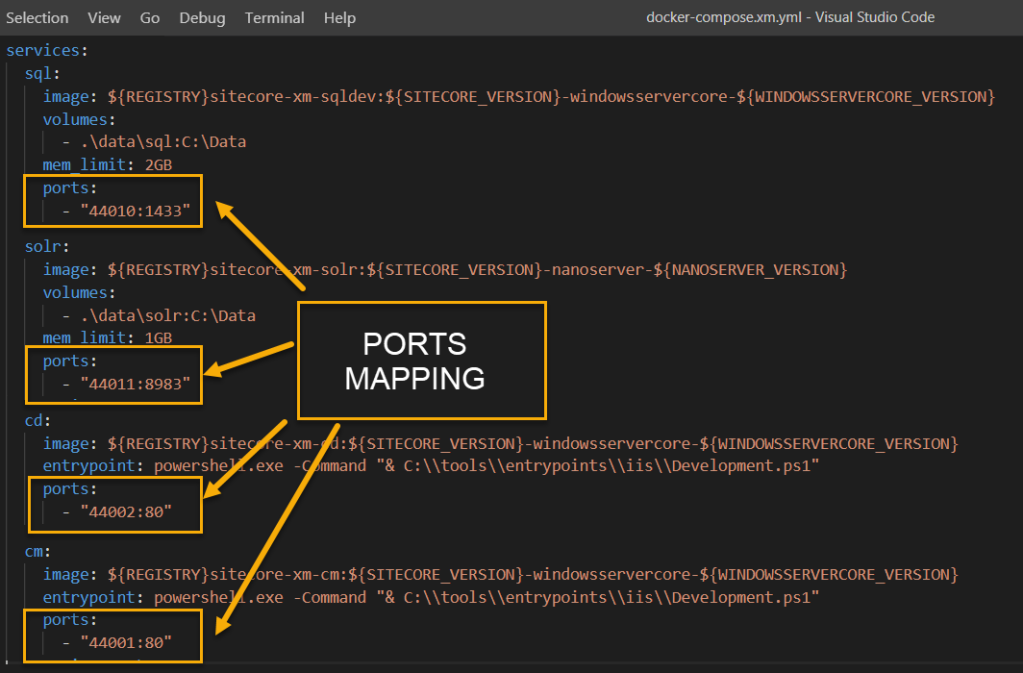
It means that
- The url http:\\localhost:44001 is to get access to CM server
- The url http:\\localhost:44002 is to get access to CD server
- The url http:\\localhost:44010 is to get access to Solr server
- The url http:\\localhost:44011 is to get access to SQL server
That’s all for today. I leave you with a working Sitecore environment. Enjoy responsibly.
If you want to shut down your environment just press Ctrl + C.

Clean up disk after build
After build images Docker folder consume around 35 GB of disk space. When I display information about Docker images:
docker images
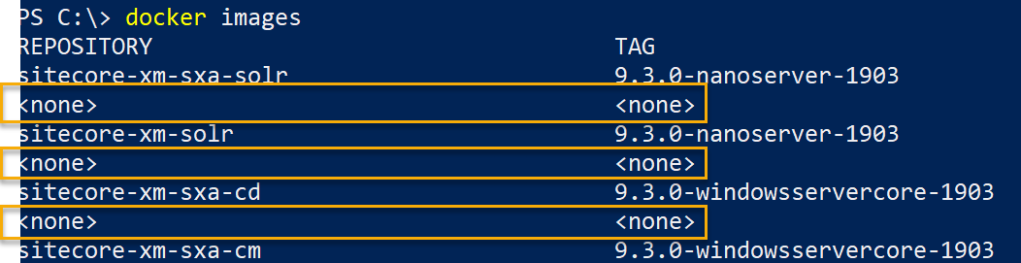
On the list you can found the strange images with tags <none>:<none>. To find more details about this you should read Docker documentation.
Docker takes a conservative approach to cleaning up unused objects (often referred to as “garbage collection”), such as images, containers, volumes, and networks: these objects are generally not removed unless you explicitly ask Docker to do so. This can cause Docker to use extra disk space.
Docker Documentatioin
In Docker documentation you can read the all useful details about how to remove unused data. In my case I recovered 10 GB when I remove dangling images with the following command.
docker rmi $(docker images -f "dangling=true" -q)
