
In Sitecore Content Hub, you can import and export data using Excel. In this post, I will briefly describe all aspects of data import/export via Excel.
TL;TR
- Use Creation component to enable Excel import.
- Use Selection component to enable Excel export.
- Use Export profile to define properties and relations for Excel export.
- A valid Excel template is crucial for importing data.
- Check Import Job to verify Excel import status.
- A single row in Excel will create 3 jobs (import, fetch, processing)
Enable Import/Export Excel.
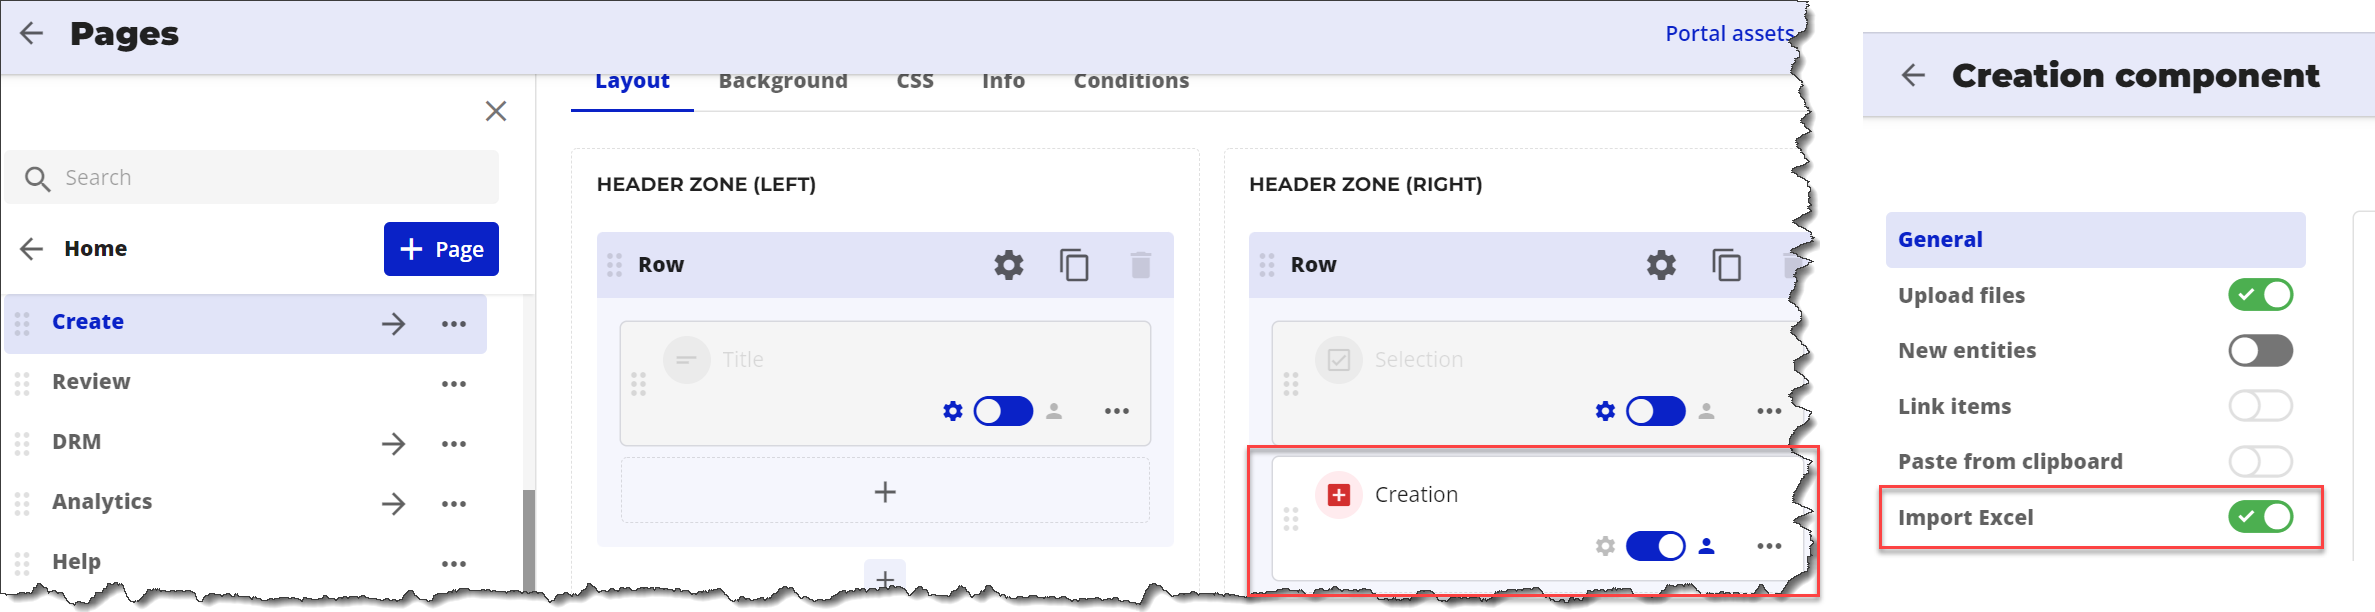
First, I will explain how and where to configure import/export functionality. When importing data to Content Hub, we usually create or update entities. The creation component is responsible for unblocking the Excel import. For example, to enable Assets import via Excel, go to Pages -> Assets -> Create and then edit the Creation component. The creation component has an option to allow/disallow Excel import.
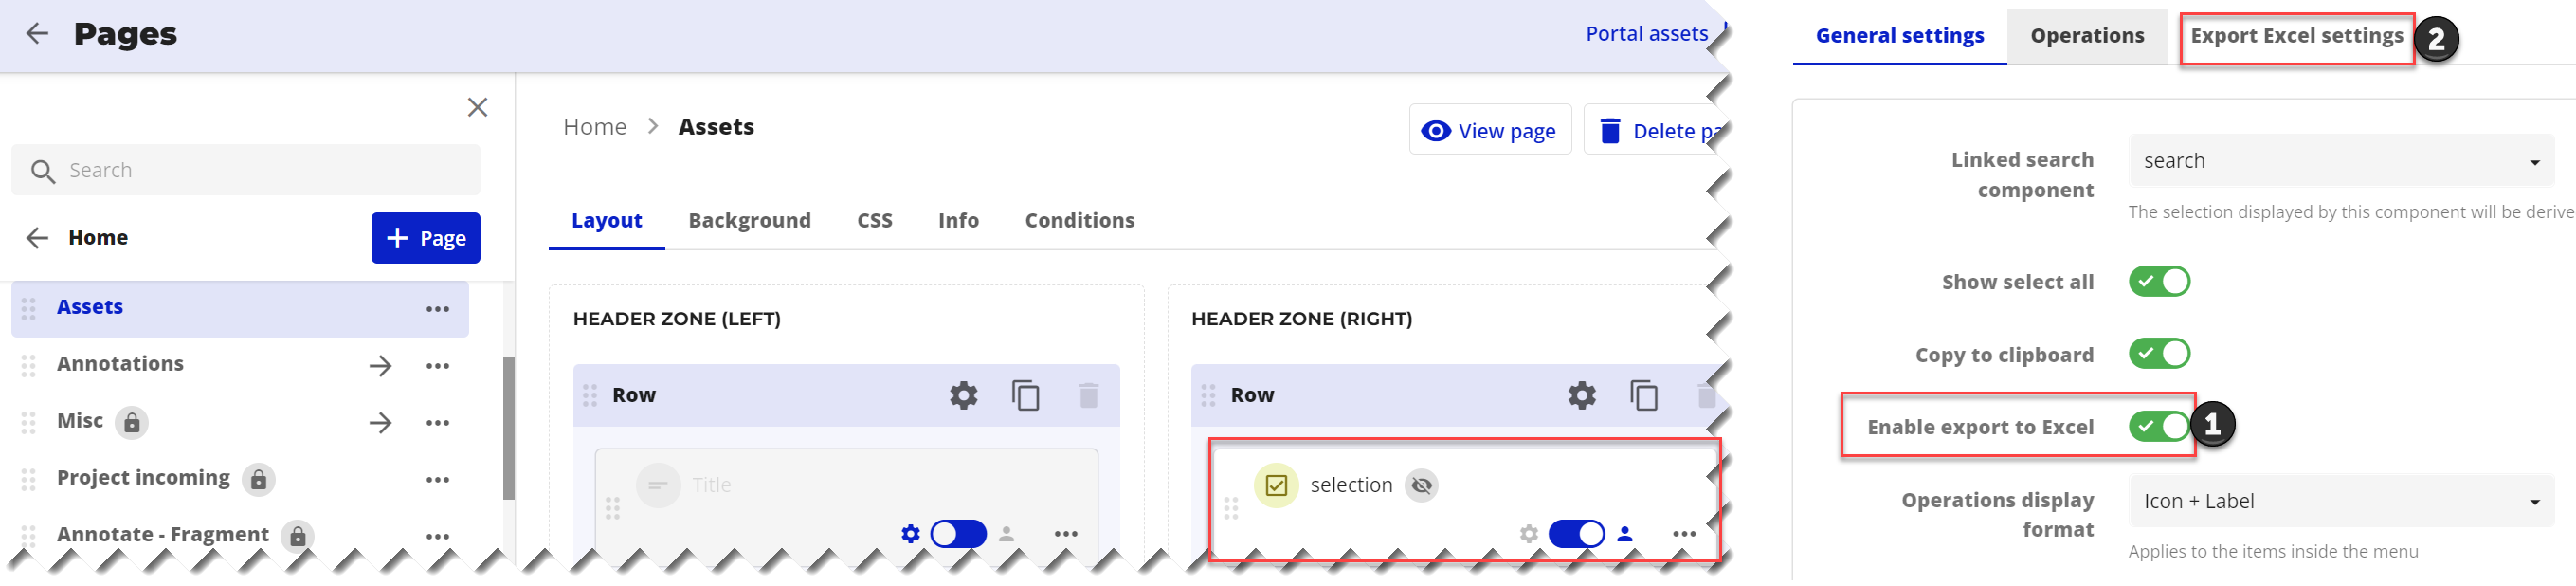
Export data configuration is a little more complicated.
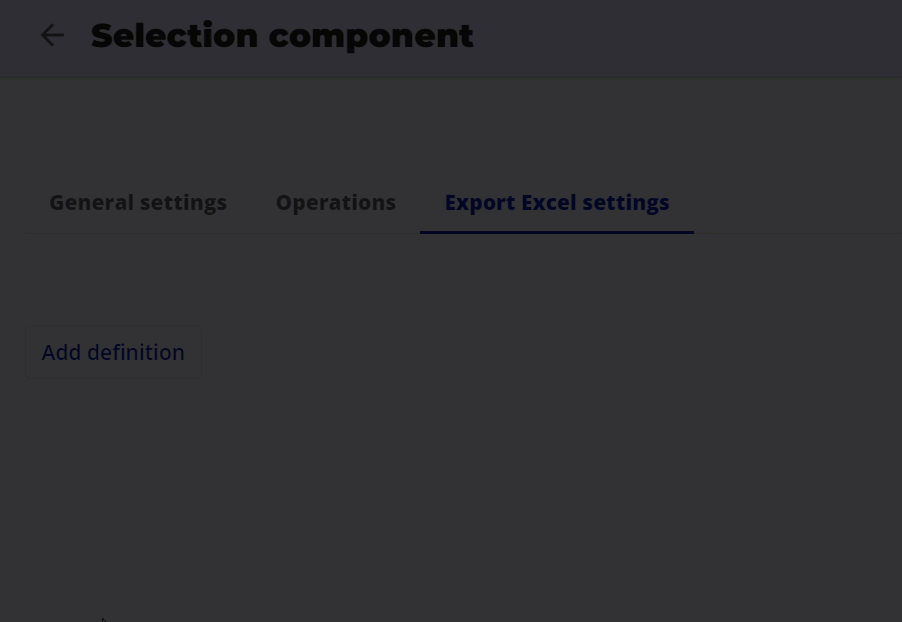
If you want to enable export data to Excel, you should use the Selection component. Once you enable export data to Excel, a new tab will appear – Export Excel Settings. Then you should choose a definition or definitions to export and specify the export profile for the definition.
With the Import button, you can import any valid Excel; with the Export button, you can export only specified definitions and data.
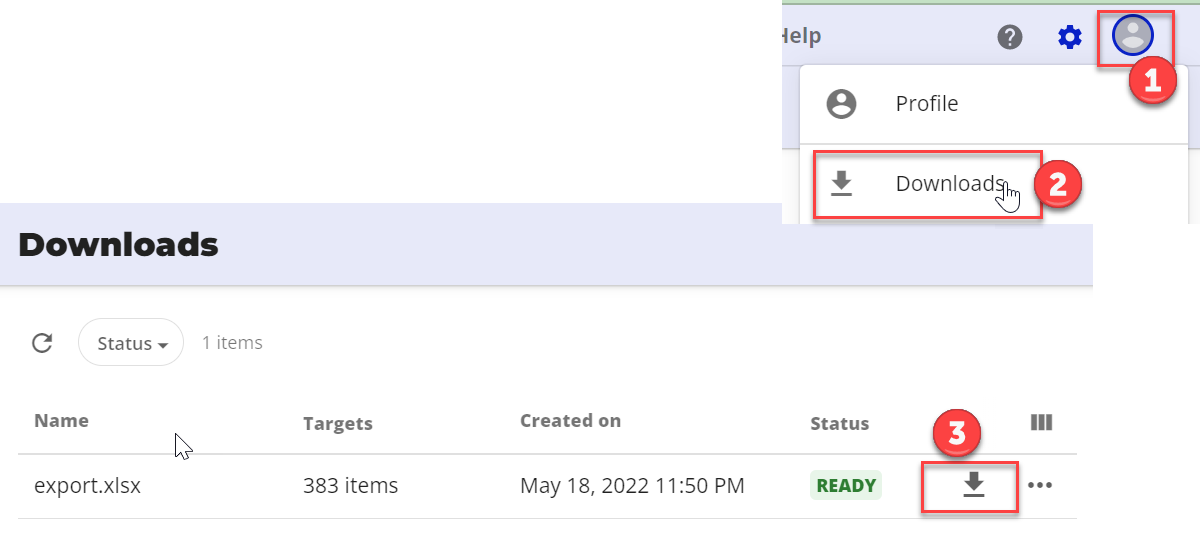
Next, you can select assets(1) and export them to the Excel file(3).
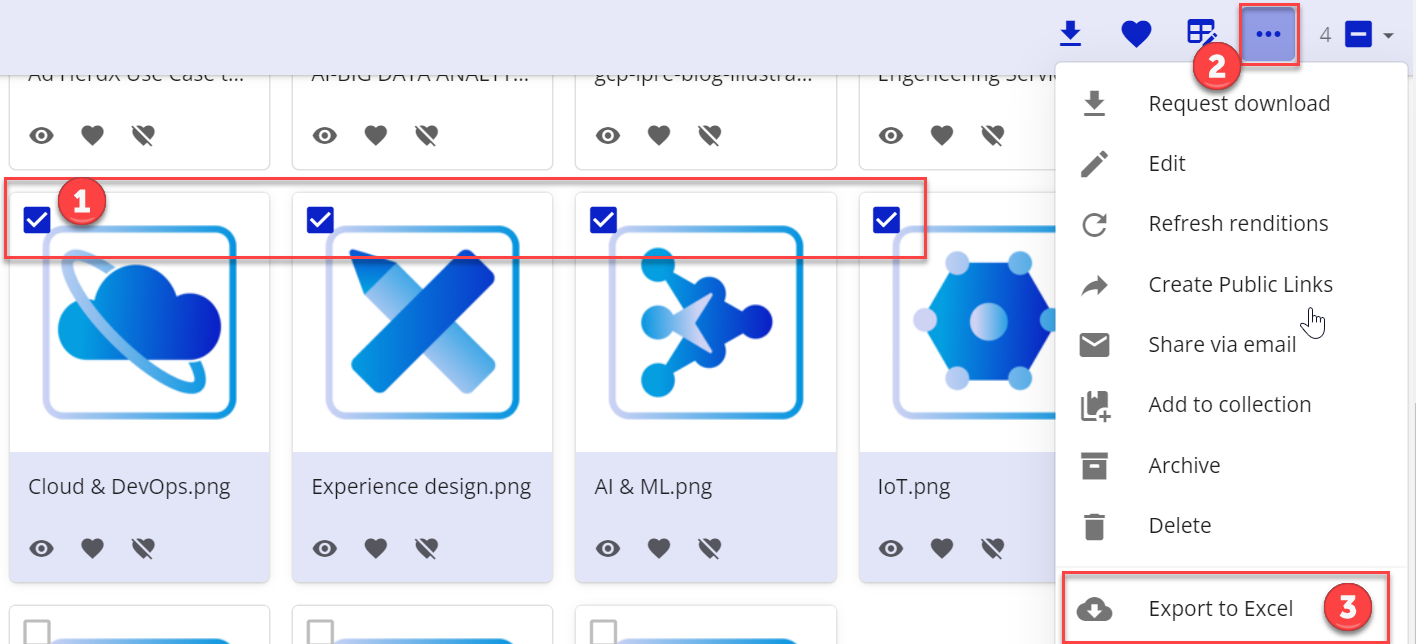
Keep in mind that you create an export order in the background, and once the Excel file is ready, you can download Excel from the Downloads section.
Export profile
You can read details about export profiles in the documentation, but long story short. We use the export profile to define properties and relations for export to the Excel file. For each definition, we can have more than one export profile. We can also specify a default export profile for definition.
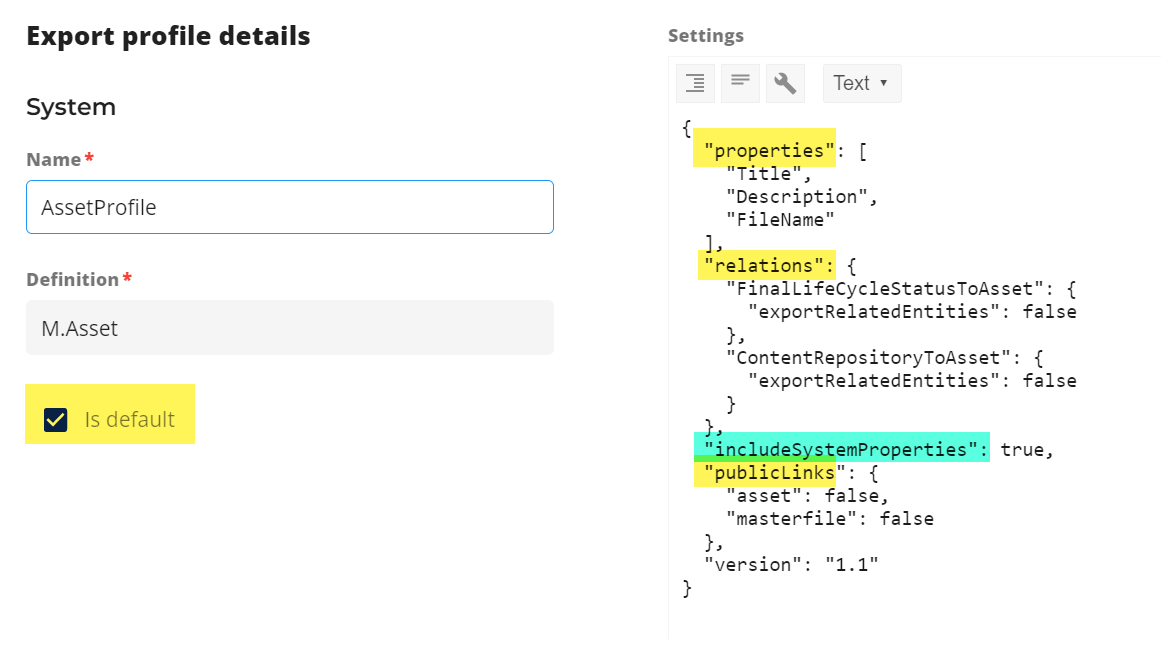
Please note that you can export public links (only for M.Asset), but the only configuration is to enable/disable public links export.
Excel template for import
First, you should understand that you can import everything from one place. The Creation component only enables the import Excel button; you do not define what and how Content Hub will import data. To specify data for import, you have to create a valid Excel template.
It is essential to have proper names for columns and sheets. Therefore, please consider first exporting some data to have appropriate names for columns and sheets. Keep in mind that some properties can be required and must be a part of Excel.
How to get all properties and relations for a definition?
If you want to have all relations and properties exported for a specific definition, do not specify any export profile for a definition.
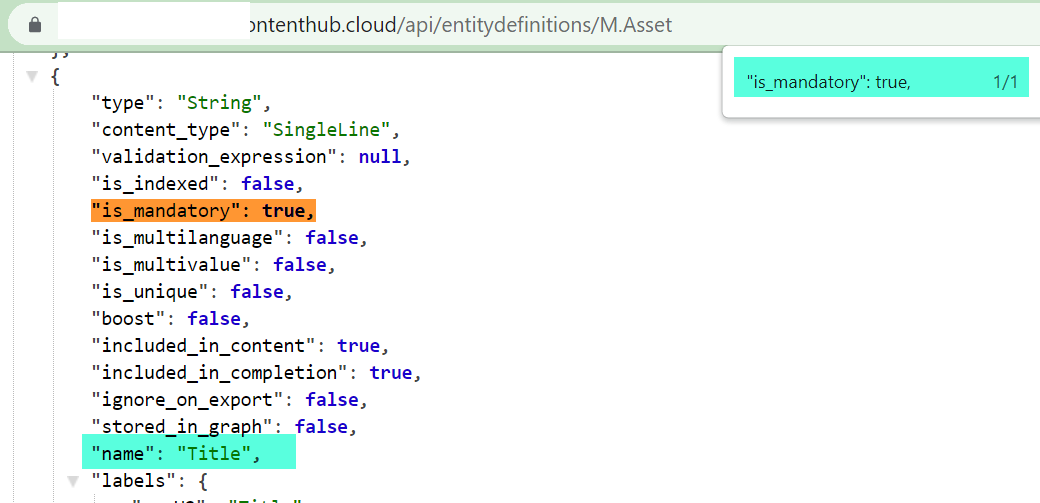
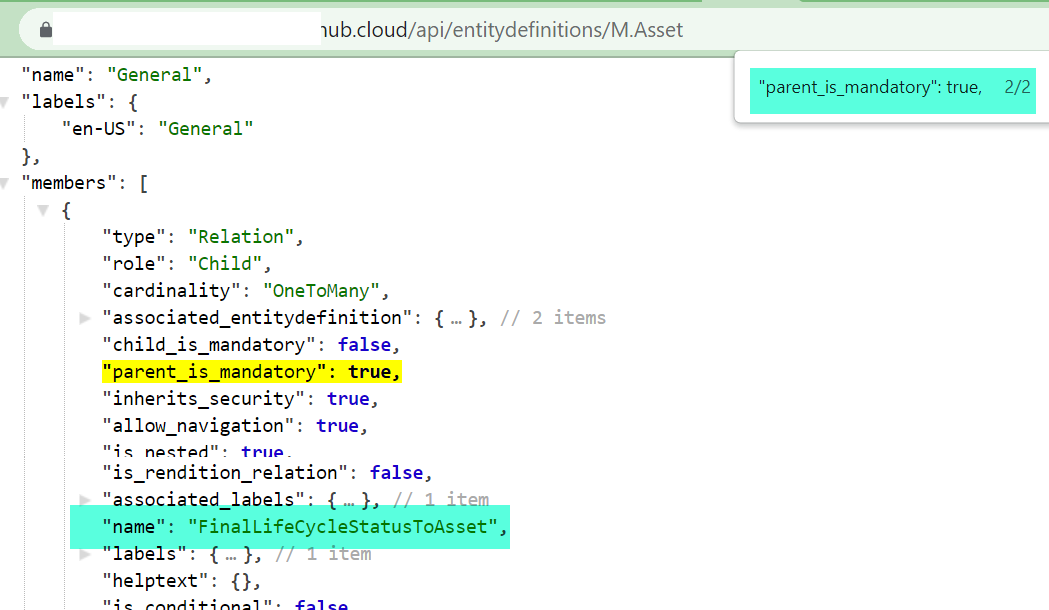
How to get mandatory properties and relations?
To find all mandatory fields for the definition the best will be to ask some developer if you are a business user to provide such list. Developer can use Content Hub API to find all mandatory properties and relations:
In the documentation you can find a details about:
- How to import OptionList by Excel file.
- How to import Taxonomies by Excel file.
- How to import/export Users by Excel file.
Import assets jobs.
When we import assets to Sitecore Content Hub using an excel file it’s worth knowing what is going on in the background. Especially since such a question may appear on the Content Hub Certification exam.

The picture above visualizes the whole process:
- Each Excel sheet will create one import job
- Each row in the Excel will create one fetch job
- Each fetch job will create a processing job
The import job – will create ’empty’ assets and apply all metadata from the Excel file
The fetch job – will upload the files from the public URL to the Content Hub
The processing job – will create a preview and thumbnail renderings
Please subscribe if you want to get new posts and updates directly to your mailbox.
